Bees are not too dependent on the person. But sometimes they need help. So, a bee feeder is necessary to support the bee family in an unforeseen situation. Read about what feeding troughs are and how to make them yourself, read in this review.
General requirements for feeders
Additional feeding will be required if the bee family does not have enough food. In the absence of food, bees can die of hunger. The feeder is not installed in the hive forever. But it should be at your fingertips and used when an emergency occurs, not only in winter, but sometimes in summer.
Situations in beekeeping where a feeder is needed can be as follows:
- when creating a new apiary - at this moment the bees are not familiar with the terrain and the honey plants on it and need support;
- with the onset of winter. Some beekeepers consider it necessary to install additional feeders in the fall, before frosts begin to allow the bees to better prepare for the winter;
- for feeding medicinal formulations;
- for feeding flavored syrups when teaching bees new honey plants.
Feeder Requirements:
- comfortable for insects - the nutrition process should be easy and safe for them (bees should not drown in it);
- providing easy access insects from the hive to feed;
- preventing access to the feeder for bees from other hives;
- capacious - sufficient to place up to 4 kg of product or 0.5 kg of medicinal products;
- transparent - at any moment the beekeeper should see how much food is in it, not too disturbing the bees;
- neutral - the feeder should not react with food or anything else in the hive, thereby changing the chemical composition of the food;
- easy to clean and wash.
Important! Before using any feeder, be sure to wash it with warm water. Do not use detergents; they can be toxic to bees.
Types of Bee Feeders
At the location of the feeder can be located outside and inside the hive. Outdoor are mounted and stand-alone. Such designs have a huge number of disadvantages and are not recommended for use.
- Among their shortcomings note that:
- they attract not only bees, but also all representatives of the wild nature, including wasps, birds, raccoons and even bears;
- insects using an outdoor street feeder can easily transmit diseases and parasites to each other;
- in addition, bees of this design, as a rule, fight, as a result, weak hives become even weaker.
According to the method of placement, intra-feeding feeders can be ceiling or floor. Plastic bottles, boxes, bags are attached to the ceiling. On the side plane of the nest, frame-type feeders are installed, as well as external canisters, the entrance to which is only from the hive.
The main types of indoor feeders:
- Input feeder. It consists of two main parts: a feed tray, which is inserted into the entrance to the hive, and a container with an inverted syrup, which is inserted into it, but remains on the outside of the hive. Its advantage is that you can easily see the amount of feed in it. But it does not function well in cold weather, since the liquid medium of the feed is prone to freezing, and the bees simply will not get to it.

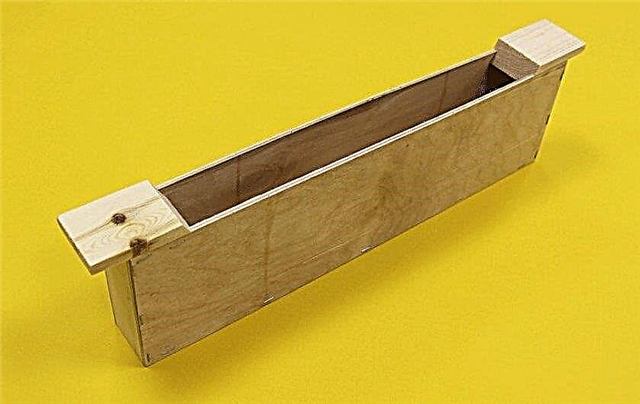
- Frame construction - This is a feed device with a dividing board. Performed in the form of a frame for brood. The material of manufacture is plastic. It is installed instead of one of the frames. The advantage of the design is that it is located inside the hive and the bees can easily protect it. The disadvantage is that the bees are drowning, despite the fact that the design is designed so that they do not sink. Moreover, if such a feeder is empty, the bees will collect a comb inside, using it instead of a frame. And if this design is glued, it can also leak.
- Ceiling structuresthat are installed in the extension under the hive cover. Such feeders have many varieties. Not all of them are comfortable. But the main drawback is that the beekeeper will need some kind of mold inhibitor to prevent it from appearing in the syrup container.

- External feeder located on top of the hive. This is a container that is flipped over the inlet in the inner lid. Bees do not drown in it, and it is protected from contact with air. The disadvantage is the heavy weight of the syrup-filled structure and the lack of stability in strong winds.
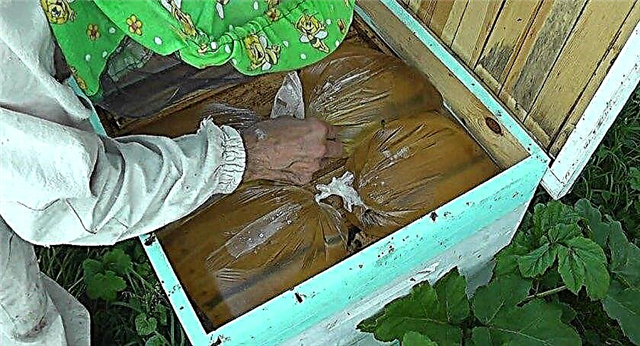
- Bag-shaped designs. In essence, this is a syrup bag in which bees drink contents through a gap. The heat of the hive prevents the syrup from freezing.
Feeder frame design
The frame feeder is a rectangular container in the shape of a frame. It can be made of plastic or wood. Mounted on a stand or attached in the same way as socket frames. It can take up as much space as two frames together. To protect the bees, rough inner walls, a special raft mesh and entrance stairs are provided so that it is convenient for insects to enter and exit the feeder.
Overfeeder
A subframe feeder is a structure mounted above the frames. It completely covers the frames on top. Some beekeepers find it comfortable for insects. It consists of two compartments with floats that prevent the bees from drowning. Syrup is poured into these compartments and then covered with the attached lid and the upper part is installed on them. The volume of the device can be different - up to 8 liters inclusive. To get to the syrup, the bees have an inlet.
Important! You can attach a box to the hive in which to place the feeder on the side, having drilled from it the entrance to the beehive.
Ceiling
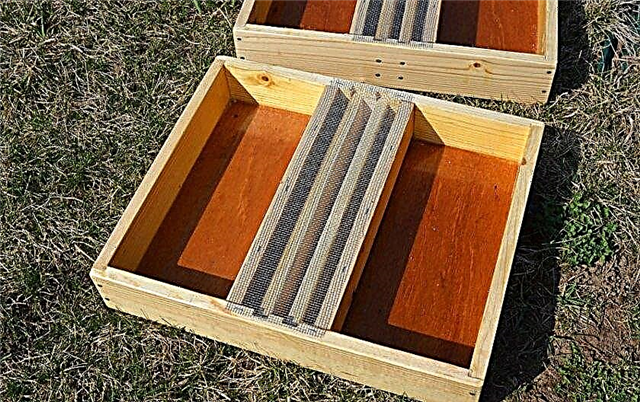
The ceiling feeder is a rectangular box-type structure with vertically arranged partitions. On the one hand, a hopper with syrup is installed. The top of the structure is covered with transparent plastic panels. Through a special hole, bees can penetrate inside. The design is attached to the ceiling. Inside the food compartment there is a raft for bees.
Video: DIY Bee Feeders
External
An external feeder is mounted on the outside of the hive. It is made of wood or plastic. Represents a box or other capacity. Pour feed into the box. The passage for bees is made from the inside of the hive through the wall, and feed is poured from the outside. A raft is installed inside the structure. During feeding, bees sit on it. A huge disadvantage of this design is its dependence on the temperature in the street. In cool weather, the food cools, and the bees reluctantly eat it.
Did you know? The most valuable honey in the world is the product of giant Himalayan bees. It is valued not only for its beneficial properties, but also for being a hallucinogen derived from Himalayan rodendrons.
DIY feeder making
The question of a homemade bee feeder can arise for various reasons:
- You tried a lot, but did not find one that would completely suit you;
- you urgently need a feeder;
- there is a desire to do with less money.
Before you design, you need to understand the principle of the design and only then move on to the drawings and manufacturing. The future feeder should provide for the capacity in which the syrup will be located, the path along which insects will get to the feed, and a way of interacting with the syrup that is safe for bees.
Video: Simple and convenient bee feeder
From a plastic bottle
The simplest version of a feeder from a plastic bottle consists of:
- bottles;
- pallet.
To install the feeder motionless, use a clamp to secure the bottle to the pallet. This is the simplest design. A feeder with fasteners can be installed at the entrance to the hive or placed above the frames, if used without fasteners.
Important! Most hives have standard designs, so you can always buy feeders and accessories for them in beekeeper stores.
Horizontal feeder
The horizontal bottle design is extremely simple. You only need a bottle and a hot nail. Used bottles of any size.
Instructions for manufacturing:
- In a plastic bottle, holes are made with a hot nail. They can be 3 or 4. The size of the hole should not exceed 0.3 cm. This is enough for a bee.
- Pour the syrup.
- Lay the bottle horizontally on top of the frames.
- From the holes made, syrup will leak, which the bees will use.

Vertical feeder
The basic design is very simple: a bottle or a feeding jar sits on a wooden platform that approaches the entrance to the hive. Bees get access to food through the holes in the lid of the inverted jar.
Instructions for making a feeder from a plastic bottle:
- Prepare a case (holder) in which the bottle will be installed: a wooden frame, with a stand, which is both a feeding place and the bottom of the structure. The width of the bottom of the stand is 8–10 mm, the inner width is 6 mm. These sizes are acceptable for bees and will not let them drown in syrup. The length and depth of the pallet are not critical.
- A hole is made in the lid of the bottle so that liquid syrup can pass through it to the stand.
- They collect food into the bottle and install it in the structure.
- The syrup will gradually enter the pan as the insects eat the previous batch.
Important! Do not use resinous wood boards. Resin can give honey a specific flavor.
Ceiling feeder
The ceiling feeder is made of plastic, plastic or wood. The height of the structure is not less than 30 mm. It is presented in the form of a box with partitions. Mounted on a frame of boards and mounted above the frames. The sizes of these feeders are calculated based on the size of your hive. The dimensions of the structure below are for the Varre hive.
For work you will need:
- boards;
- galvanized wire mesh;
- screws;
- fasteners;
- moisture resistant glue on wood;
- wood drill;
- saw;
- scissors for metal;
- hammer;
- auxiliary tools.
From the board will be made: the floor of the feeder (10 "x 11 7/8" x 3/8 "), the inner wall (1" x 3 "x 12 1/2"), the ends of the feeder (1 x 4 "x 11 5 / 8 ") and its long sides (1" x 4 "x 13 1/2").
In order not to make a mistake with the dimensions, look at the design drawing and recalculate the dimensions for your hive. To ensure that part of the syrup feeder is airtight, beeswax can be used. It perfectly seals all joints.
Step-by-step instruction:
- Make 2 long sides of the box and 2 short sides of the board. Make sure that they fit well with the size of the subframe space in which they will be installed.
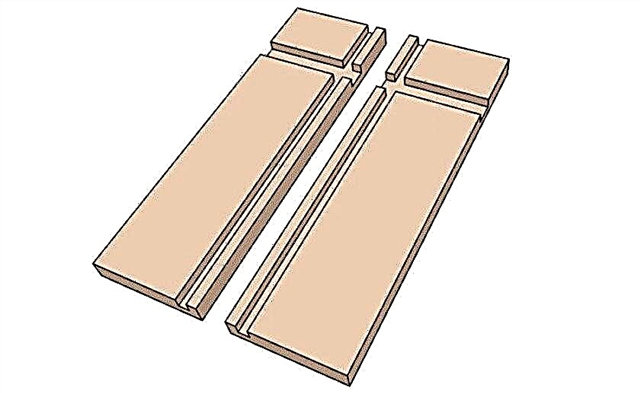
- Make the inner wall of the board.
- Saw the slots into which the plywood sheet will be inserted (floor of the feeder).
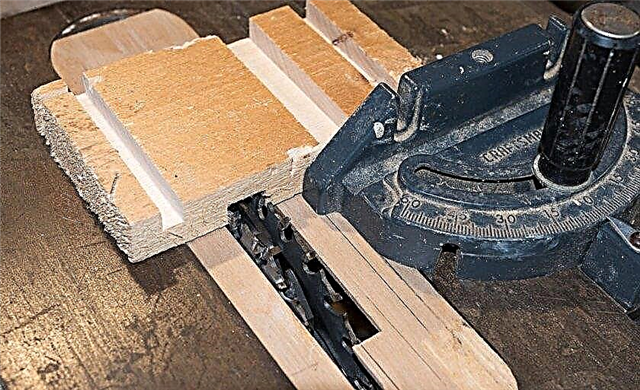
- Keep in mind that moisture can expand due to moisture, and the cut-out grooves should be slightly larger than the thickness of the board used for the floor.
- The inner board is installed in such a way as to leave a place for bees to pass (similar to the summer holes).
- Use the screws to assemble the box. At the joints, you can also use glue on wood.
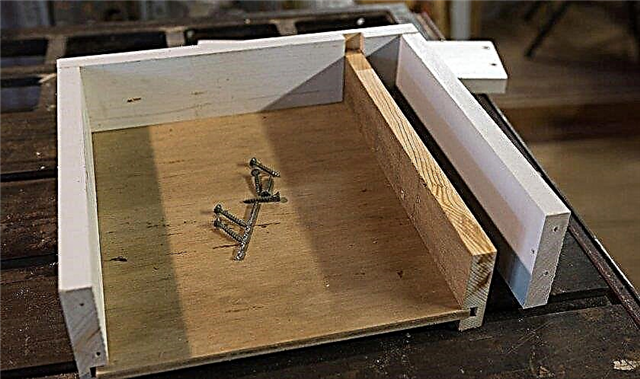
- After assembly, you will see two holes at the end of the feeder left by narrow slots for the floor. If left open, they can act as input / output for bees. You can add small pieces of metal to them, which will block the course, if you need to refuel the feeder.
- Fasten the grid sheet to the inner wall.
- Wax the bottom and seams. It will protect against moisture and protect the container from mold.
- Fill the feeder with water and check the tightness of the joints for several hours.
- Cover with a metal mesh the part along which the bees will get to the feed.
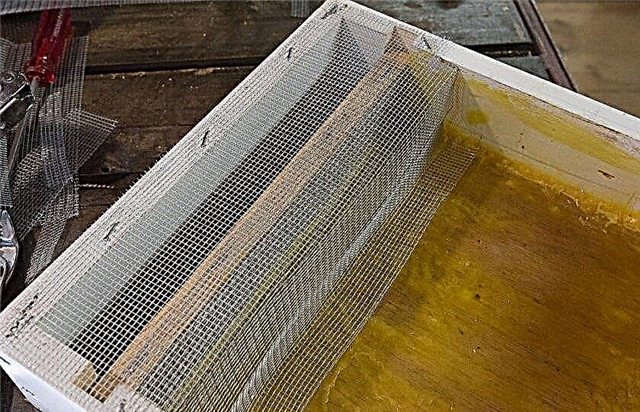
- Fasten the mesh and your feeder is ready to use.
- The top is closed with a sheet of transparent polycarbonate or plastic for the convenience of the beekeeper.

From a glass jar
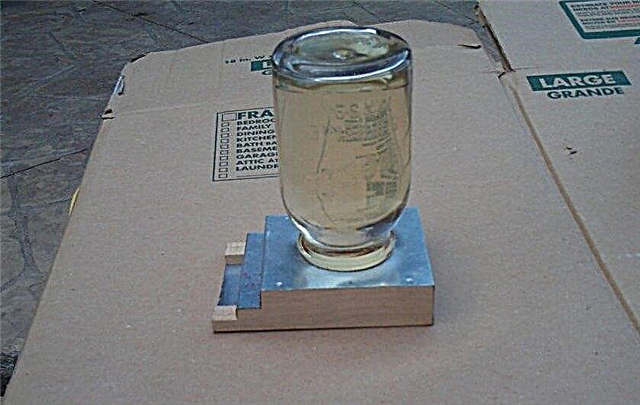
A glass jar feeder (input feeder) is installed at the entrance to the hive. The basic design is very simple: the jar with food "sits" on a wooden platform. Bees get access to food through the holes in the lid of the inverted jar.
The advantage of the design is that you can see the level of syrup. And there is no need to open the hive to check or replace food. But the disadvantage of the external design is that it attracts other insects.Did you know? Bees can seal and disinfect the hive on their own. They do this with propolis. This resin —natural sealant with high bactericidal properties.
Step-by-step manufacturing instructions:
- Cut 2 boards according to the dimensions indicated on the image. The material is wood. These boards will become the sidewalls of the frame.

- Cut a piece of sheet metal 4 1/2 inches by 14 inches. Strip sharp edges.
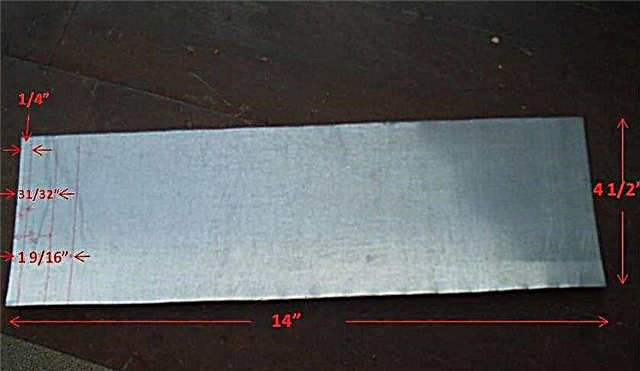
- In the lines marked with a red marker, bend the sheet at a right angle.
- The resulting element should fit into the board entry profile.
- After moving the side board of the frame to the bend of the input profile in sheet metal, make a mark on it showing where the back of the side frame will be located.

- Repeat on each side of the metal sheet.
- Draw a straight line between the two marks - here will be the first deflection for the feeder.
- Holding the side panel of the frame in place, make a mark on the metal to indicate where the fold line should be.
- Draw a line between the marks.
- Fasten the sheet in a vise.
- Fold the sheet in a line at an angle of 90 degrees.

- According to the diameter of the can, you need to draw a circle on the sheet of the feeder. Position it in the center, mark with a marker and make a hole with a circular saw.

- Smooth sharp edges.
- Connect the parts of the structure with a screwdriver.
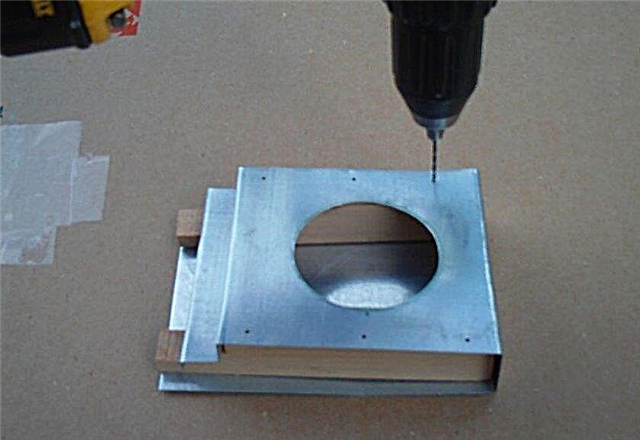
- Make holes in the lid. Their number does not matter.
- Fill the jar with syrup and place it with the lid down. The syrup will be held inside.
From plastic bags
The feeder from the bag is a dense plastic bag with a zipper. Syrup is recruited into it. The package is placed above the frames, making a neat cut in it. Bees will feed through it. This method came to us from Australia and has taken root in many countries because of its simplicity.
Important! Experienced beekeepers recommend not making incisions, but simply sprinkling the bag with syrup. This will attract the attention of insects. And they will make holes on their own. And these will be the most correct hole sizes.
Methods for attaching a bee feeder
Ceiling feeders are placed above the frames. They are installed or stacked on top of them. The frame structure is attached to the shoulders.
When choosing a feeder, focus on the requirements for them, convenience for the beekeeper and for insects. Each design has its own advantages and disadvantages. And the beekeeper just adapts to the one that works best for his bees.


