More and more often in small summer cottages and in household plots you can see modern polycarbonate greenhouses. These structures are beautiful, reliable and durable. In this article, we will talk about the Harvest of Elite greenhouse, its characteristics will be given and recommendations on how to install the facility on the site will be given.
Design Features of the Harvest Elite Greenhouse
The greenhouse is designed in the form of a semicircular barrel, this is an arched model. The distance from the floor to the ceiling in the highest part of the semicircular arch reaches 210 cm. The width of the structure from wall to wall in the soil area is 300 cm, the length of the greenhouse is 4 m. There are doors on both sides of the greenhouse ends, in the upper part of which there are two opening transoms for ventilation. It is also possible to control the degree of openness of transoms. The greenhouse frame is made of square galvanized profile (closed). The metal frame of this model has increased strength, due to the often repeated transverse arcs, the distance between which does not exceed 60 cm.
When assembled, the greenhouse is of a minimum, 4-meter length, and weighs 90 kg. The greater the length of the greenhouse shelter, the greater the weight of the structure. The design is covered with tight-fitting sheets of cellular polycarbonate. The thickness of the sheet can vary from 3.5 mm to 16 mm, which significantly affects the purchase price. Experienced gardeners are advised to choose the thickest polycarbonate, in this case the greenhouse will last much longer.
Important! Rain water that has got inside cellular polycarbonate, over time, under the influence of sunlight begins to turn green, thereby preventing the penetration of light into the greenhouse.
Also, do not save, and pay for the complete set of the greenhouse with connecting plates for longitudinal fastening of polycarbonate sheets to each other. Such fasteners will allow not using self-tapping screws to fasten polycarbonate sheets, and thereby avoid violating the integrity of the material. The fewer holes, cuts and other violations of the integrity of the polycarbonate sheet will be made during assembly, the stronger the coating will be greenhouse and the longer it will last. It is also worth ordering plastic caps for open parts of a polycarbonate sheet when completing the greenhouse. These plugs are worn on open ends or sections of polycarbonate sheets, and do not allow rainwater or dust to get inside the sheet, leaving the interior of the coating completely clean.
Benefits
- The main advantages of the greenhouse are:
- Lightness, strength of the frame, streamlined shape, in which rainwater is not held on the roof and the snow cap partially slides.
- An important advantage is the ability to replace coating sheets that have become leaky over time.
Disadvantages
- The main disadvantages of the Harvest Elite greenhouses are:
- The need to install on an absolutely flat site, since any unevenness after some time causes the deformation of the polycarbonate sheet and the distortion of the entire structure.
- Also depressing is the large sailing of the arched structure, which requires, taking into account the lightness of the greenhouse, strong reinforcement on the foundation or good adhesion to the ground, if the greenhouse is installed directly on the ground.
- Despite the stated durability of the polycarbonate sheet, gardeners in practice realized that in winter it is necessary to clean the roof of the greenhouse after each snowfall. If this is not done, the roof falls through the structure under the weight of the snow cover.
Selection of optimal greenhouse sizes
Manufacturers offer different lengths of "Harvest of Elite", starting from a minimum of 400 cm. The gardener can choose the length of the structure that suits his requirements, it can have a duration of 6, 8, 10, 12 and more meters. The main thing is that the planned frame length is a multiple of two, since the width of a standard polycarbonate sheet is 210 mm.
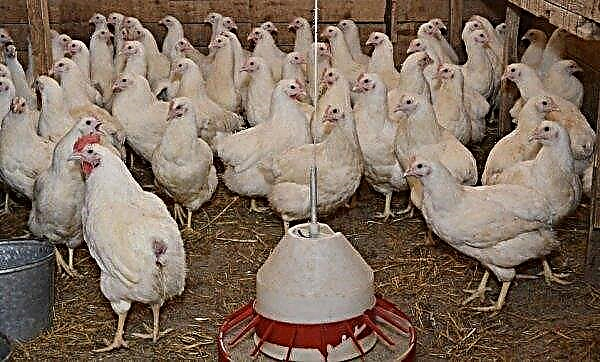
Did you know? Witty gardeners adapted polycarbonate greenhouses empty in the fall and winter for poultry walking, since the building is relatively warm, light and the cold wind does not blow. In response, the layers delight the hosts with a long period of egg laying, which is quite rare in the cold season.
How to assemble a greenhouse with your own hands
In order to properly assemble the house for plants, it is necessary to prepare the site, carry out the markup and precisely follow the instructions given in the instructions. It is recommended that before the start of assembly, a foundation be built for the structure, but you can do without it.
Foundation selection
The greenhouse frame can be erected on various types of foundations: from brick, thick boards or concrete pouring. Also, in some cases, you can install the frame of the greenhouse directly on level ground. Before starting the installation of the foundation, it is necessary to choose a place suitable for the greenhouse. It should be located from south to west, this contributes to good lighting plantings inside the structure by sunlight. The strongest foundation will be a concrete foundation.Near the selected location, tall trees that can cast a shadow and partially or completely obscure the interior should not grow. It will be successful to place the greenhouse on the south side of any structure: a house, a barn or a capital windproof fence.
Important! When constructing the foundation under the frame of the greenhouse, the builder needs to use the building level to check the horizontal position of the site. If the site will have irregularities, the polycarbonate sheets will be distorted, which will lead to damage to the structure.
Capital base construction:
- The soil in the place where the greenhouse will be located is well leveled, and then markup is carried out.
- A capital foundation under the walls of the frame is built around the entire perimeter of the future structure and has a width of 30–40 cm. Before its creation, a trench 30 cm deep is dug along the perimeter.
- Pegs are installed at the corners of the perimeter, between which wooden boards are laid for pouring concrete formwork. Formwork boards should be installed around the entire perimeter of the structure, located along the edge in two parallel rows, between which a distance of 30-40 cm is observed.
- The bottom layer of the future foundation is poured out of sand, the thickness of this layer is 10 cm.
- The next layer will be a gravel sprinkler, the thickness of this layer is about 20 cm.
- Further, in the corners of the foundation and in the place where the doors will be located, metal supports up to 50 cm high are also installed, in the future the greenhouse builder will be able to shorten them, according to the requirements of the installation.
- Builders are pouring concrete mix into wooden formwork. Concrete is left to harden in the formwork for a couple of days, after which the formwork boards are removed. The capital foundation is ready to collect the frame of the structure.

The implementation of the brick foundation:
- The brick foundation for the greenhouse is much easier to perform than the foundation of concrete pouring. After the preparation and leveling of the site, the builders mark the future structure using pegs and ropes.
- A small ditch is dug around the perimeter of the structure, the depth of which does not exceed 10 cm and a width of 25 cm. Sand is poured into the ditch, so that the level of sand and the adjacent soil are at the same level.
- Next, bricks are laid around the perimeter of the structure. The calculation is done tightly, the bricks are laid in one row, with the longitudinal sides to each other. If desired, the bricks in the row can be fastened with cement-sand mortar. You can also make the foundation not in one row of bricks, but, for example, in 2 or 3 (at the request of the builder).
- The completed brickwork is left for several days until the cement mortar completely hardens, after which the foundation is ready for the construction of the greenhouse frame. If the bricks are laid without the use of cement mortar, the installation of the frame can begin immediately after the completion of the construction of the foundation.

To install a greenhouse without a foundation:
- In this case, it is necessary to pre-prepare and level the area, after which metal pegs or pipe cuts are driven in along its perimeter, on both sides of future doors and at the corners. This is a necessary condition so that after (or during) the installation of the frame of the greenhouse, the builder can firmly fix the structure.
- To fix, a bundle of the frame and metal pipes protruding from the ground with iron bolts or hooks is carried out. This is a necessary safety measure so that the greenhouse is not taken down by a hurricane wind.
Video: pipe foundation
End assembly
The first steps in assembling the frame begin with the connection of the metal parts of the greenhouse ends. End assembly process:
- Work is carried out on a flat surface, it is best to do it on the street. Collect all the details according to the drawing attached to the model.
- After the assembly of the end face from the metal profile is completed, polycarbonate is fixed to the end frame.
- Details from a sheet of cellular polycarbonate are marked according to the drawing, and then cut out from a continuous sheet of coating using a hand jigsaw or a sharp construction knife. When cutting and attaching polycarbonate to the frame, a protective film is left on it.
- To fix polycarbonate on the frame in the right places of the plastic coating, the builder independently makes holes for screws. Therefore, for the production of such work, it is advisable for the builder to prepare an electric or hand drill, a carrying case for connecting to electricity and a drill of the desired diameter.
- The door frames are assembled separately from the end parts. To cover the doors and the transoms provided for them for ventilation, polycarbonate is cut to size. After that, the cut out parts of transparent plastic are fixed to the frames of doors and window leaves. Ready-made doors are fixed to assembled and coated with polycarbonate end parts.
Video: end assembly
Frame assembly
When the end parts are completely ready, the builder comes time to do the construction of the main greenhouse frame. To do this, first carry out the assembly of the base of the frame around the perimeter. Frame Assembly Process:
- If the greenhouse is installed on the foundation, then the assembled perimeter is firmly fastened to the foundation.
- Next, fix the side arches of the frame.
- When all the side arches are installed, the transverse long fasteners of the frame are installed, they are placed on the side walls of the structure.
- After the main body of the frame of the structure is assembled and firmly fixed, builders fix pre-prepared end parts. For assembly and connection of metal frame parts, a drill and self-tapping screws are used.
Video: greenhouse frame assembly
Frame cladding
After the frame is completely ready, it’s time to install the greenhouse cover sheets. If the ordered kit does not provide plastic profiles for the longitudinal connection of polycarbonate sheets with each other, then the builder will have to stack the sheets so that they overlap with adjacent sheets by about 10 cm.
Did you know? The gardener may well grow cucumbers in the greenhouse, the fruit length of which will reach almost 1 m. To do this, it is enough to plant such varieties of cucumbers as Chinese Long, Chinese Miracle or Chinese White.
In places of overlap, polycarbonate is fixed with screws. To do this, drill holes of the corresponding diameter with a drill. I would like to note that the option of using connecting profiles is much more expensive, but it is preferable to work with self-tapping screws, since during installation with the help of a profile polycarbonate is not damaged at the joints. Covering the frame with polycarbonate The gardener chooses the thickness of the greenhouse coating for his wallet, as the thicker the polycarbonate, the more expensive it will be. But this is precisely the case when the avaricious pays twice, since thin cellular polycarbonate will last only a few years, after which it will need to be replaced. But if you consider that acquiring a greenhouse for a summer cottage is quite expensive, you should pay a little more, but get the quality and guarantee of the coating service for many years.
Important! Builders are advised to use tight gloves when working with polycarbonate sheets (cutting, mounting). If you neglect the protection of the hands, there is the possibility of injuring the skin on the sharp edges of the plastic.
Polycarbonate can have a thickness of 0.75 mm to 50 mm, but its honeycomb variety, used for greenhouse coating, has a thickness of at least 3.5 mm. The most suitable polycarbonate thickness for greenhouses is considered to be a thickness of 8-16 mm. Each of these colors indicates the degree of protection of plants growing inside the structure from ultraviolet rays. Also, cellular polycarbonate can have a different color of plastic: be transparent, blue, blue, yellow or red
Greenhouse Care and Maintenance Tips
Engineers designed a rather successful model of the greenhouse, but during the operation of the "Harvest Elite", gardeners come to the conclusion that some design improvements are possible. Often complaints are received that during street rains, water flows into the air vents provided for airing the plants. To prevent this, craftsmen glue a plastic or rubber side from the outside of the street transom.
Did you know? Cellular polycarbonate was first produced in Israel, although the first samples were obtained in America and Germany in the fifties of the last century.
In winter, greenhouses, in the bulk, are not used by gardeners. So there are empty transparent cases in winter, experiencing all the charms of winter weather: rain, wind and frost. All these natural factors negatively affect the expensive sheets of cellular polycarbonate, they receive mechanical damage from frost, cracks from excessive loads with heavy wet snow and partially lose transparency under the influence of dust and wind. Resourceful people, sparing the greenhouse, found a way out of this situation and removed the polycarbonate coating for the winter, it’s good that literally a few bolts need to be unscrewed, after which the flexible coating material is rolled up and hidden under the roof for the winter (in a barn or a summer house). Such a witty exit also has a beneficial effect on the soil under the greenhouse, since the absence of a roof allows snow and rain to freely enter the greenhouse beds.
At the end of the growing season, the structure must be freed from plant debris and the transparent walls should be washed from dust with the help of warm soapy water. At the end of washing, soapy water is washed off from polycarbonate sheets with water from a hose, and the doors at the ends of the greenhouse are left open until the temporary structure dries well.
If the greenhouse remained covered with polycarbonate in the winter, then in the spring, as soon as the snow falls on the site, it is recommended that the greenhouse owner wash the polycarbonate sheets from the street (outside). This procedure will help to increase the light transmission of the plastic, as dust and dirt accumulated on the surface during autumn and winter will be washed away.
Today, modern greenhouses made of cellular polycarbonate are replacing, already becoming classic, polyethylene-coated greenhouses. The Harvest Elite model will allow the owner to grow an early crop of vegetables and greens in a personal plot.

