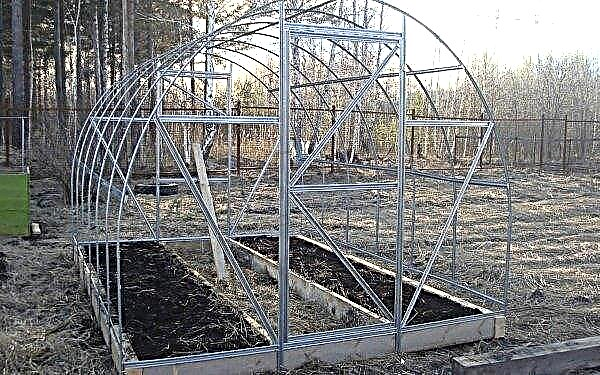
Plastic and glass containers can become inexpensive and high-quality raw materials for the construction of farm buildings. The article describes step by step the principles of constructing a greenhouse from bottles, and also lists the main advantages and disadvantages of such a design.
Features of greenhouses from bottles
The reuse of modern waste is considered a trendy trend. While the majority of them assemble and sort, the most household ones create products and even buildings, for example, small bottle greenhouses from waste materials. Bottles, especially plastic ones, are considered to be a material that can hold warm air. This is explained by the characteristics of the material of manufacture and its properties.
Glass and plastic bottles belong to porous bodies. The tank contains air, which in combination with dense sealed walls creates a special layered structure, characterized by low thermal conductivity. This feature makes glass and plastic bottles the best material for arranging greenhouses. Such a structure will be warm and almost vapor-proof, which creates the necessary humidity and a special microclimate inside. In addition, such a greenhouse is open to sunlight, which is important for the growth and fruiting of plants.Did you know? The greenhouses were first built during the time of the Roman Empire. They were heated structures covered with mica.
Advantages and disadvantages of bottle greenhouses
- Empty containers for drinking products are an excellent option for the construction of a budget and efficient greenhouse with the following advantages:
- the construction can be erected with one's own hand, without a special education or skill;
- durability - bottles are resistant to weather conditions and the effects of solar radiation, so the structures of them will last more than one year;
- minimum costs - greenhouses can be built from your own waste and improvised materials;
- able to warm up perfectly under the sun and at the same time retain heat for a long time;
- in case of damage, such a structure can be instantly restored.

- They have bottle designs and disadvantages:
- the construction of such structures is time-consuming, it is necessary not only to erect a frame, but also to fix each bottle with one's own hand;
- it will take a lot of empty containers to build, so collecting them will take time;
- during construction, you need to carefully monitor the fit of the bottles to one another, otherwise the effectiveness of the structure will be low.
Bottle selection
Most often containers for drinks are glass or PET containers. However, for repeated use, plastic containers are more often used. They have many advantages. The most significant of them is low weight, which allows you to create even large structures without a dense base (foundation) directly on the soil.
In addition, they are resistant to mechanical damage, which makes it possible to carry out a bunch of them together without much difficulty. The structure can be erected quickly, and in the future, if necessary, move it around the site.
Glass containers are less popular, they are more expensive, and also require additional costs. Glass is a heavy material, therefore, in order to build a building out of it, a concrete foundation is required, otherwise such a greenhouse will collapse during operation. In addition, concrete is the main cementing element of glass containers; only with its help can a dense, airtight structure be created. However, the main advantage of the glass bottle building is its high strength. The use of glass in combination with concrete makes it possible to construct a solid building that can last for decades.
How to build a greenhouse from bottles with your own hands?
To build a bottle greenhouse, you will need minimal construction skills, as well as a small set of tools. As the main material, it is better to use plastic bottles for carbonated drinks. They are practical, inexpensive, but at the same time they have excellent heat-insulating qualities and mechanical strength.

Preparation for construction
Painstaking preparation is the only measure that makes it possible not only to design a structure, but also to make it resistant to any weather phenomena. It is also required to prepare the site - the area under the greenhouse should be carefully leveled and cleaned of weeds and plant debris.
Bottle preparation
The first thing to do is sort the containers by color and size. Only transparent containers of white or blue color are suitable for construction, it perfectly transmits sunlight, which is important not only for growth, but also for heating the air in the structure. The size of the bottles does not play a decisive role, but they often use containers of 1.5 or 2 liters, as it is more convenient to handle than mini-containers. Next, the sorted bottles are cleaned of stickers and washed well under running water, then dried in the sun.
Important! Plastic containers should be the same size. — this not only facilitates their installation, but also contributes to the integrity of the entire structure.
Necessary tools
To build a greenhouse, you must take:
- wood hacksaw;
- awl;
- building level;
- ropes with pegs (for marking);
- measuring tape;
- bayonet shovel;
- hammer;
- electric drill with a set of drills;
- carpentry corner;
- mounting stapler.
Material calculation
To calculate the necessary materials, you should decide on the size of the future building. Given the need for a large number of bottles, such a structure should not be made excessively large. The size of the base of an ideal greenhouse should not exceed 2 × 3 meters, while the height of the wall should be within 2 meters. It is better to make a gable roof, with a ridge height of about 1 meter.

For the construction of the building you will need a set of the following materials:
- pine beam 4 × 4 × 600 cm - 6 pcs.;
- pine rail 2 × 2 × 300 cm - 50 pcs.;
- equilateral mounting bracket 4 × 4 × 6 × 0.2 cm - 25 pcs.;
- bottles of 2 l - 400 pcs.;
- fishing line with a diameter of 1 mm - 150 m;
- a polyethylene film of 80 microns (3 × 1.5 m) - 4 m;
- technical adhesive tape 75 mm - 150 m;
- wood screws 50 mm - 3 packs;
- concrete blocks 20 × 20 × 30 cm - 4 pcs.
Did you know? The world's first "winter garden" was made in Cologne, in 1240, in honor of the arrival of King William of the Netherlands in the city of Holland. Its founder was the German scientist and philosopher Albert Magnus.
Greenhouse construction
The assembly of the greenhouse is divided into several stages. The frame should be mounted first, only after which they begin the construction of wall and roof cladding. A warm, dry and lighted day is chosen for this, the most optimal period for this begins in early April, after the moisture from the snow melts from the site.
Frame assembly
Before assembling the frame, the entire area is marked, the base should be flat, with right angles. At the corners of the future structure, 4 concrete blocks should be laid; they will play the role of a solid foundation that protects the building from soil movement. After that, along the length of each side, it is necessary to cut a wooden beam, lay it on the base and connect each part with the help of corners.

Next, you can erect a frame of walls, for this, in each corner of the base, wooden bars of 2 meters are installed. From above, they are connected with horizontal bars, after which the junction is reinforced with corners. Two vertical pillars with a distance of 60–80 cm are installed on one side, this will serve as the future doorway. Before final bonding, all sides are measured with the building level and the angle of the carpenter, so that a perfectly even box is obtained.
After this, you can proceed to the construction of the casing. To do this, cut the bottom on each bottle, at the level of the lower ring. The resulting blanks are sequentially strung on a wooden rail so that the bottles are tightly interconnected. For the walls, blanks of 2 meters in length are required, on the roof of 1 meter.
Wall construction
To build walls, each of the workpieces is fixed perpendicular to the base, for the lower and upper contour. As fasteners, metal screws or nails are used. Each of the blanks is fixed alternately and as densely as possible to each other. For reliability and improved sealing, they are fastened together with fishing line and tape on both sides. The doorway is closed with an old door or it is made independently of plywood plates.
Important! It is better to build a greenhouse in the south or south-west side, away from trees and tall buildings, in a place protected from drafts.
Roof installation
To make a roof, 2 rectangles of 1 × 3 meters are created from the remaining beam, which are fastened with corners. After that, a triangular prism with a base of 2 meters is constructed from them, the base and all corners are fastened with a beam and corners. The resulting structure is sheathed with blanks from bottles according to the same principle as the walls.
At the same time, gables should also be carefully sewn up. After this, the structure must be installed on the base and secured with corners. To seal the roof from precipitation, it is covered with a plastic film, the edges of which are fixed to the sides with a stapler. The joints must be joined with an overlap of 10-15 cm, as otherwise the roof will leak.

Useful Tips
In order for the constructions from the container to serve for many years, we advise you to adhere to the following recommendations:
- Once a season, the polyethylene on the roof should be replaced with a new one, since under the influence of ultraviolet the film is destroyed quickly;
- since high humidity is maintained indoors, all wooden structures should be treated with protective building mixtures that prevent the appearance of fungus;
- polyethylene should close not only the roof, but also the walls, this will positively affect the microclimate of the greenhouse;
- the soil should not fall onto wooden structural elements, as soil bacteria dramatically reduce its life;
- if possible, the greenhouse should be “mothballed” for winter, external moisture adversely affects the wooden elements of the structure.
A greenhouse made of bottles is not only an opportunity to restore the life of an old container, but also to create an optimal microclimate for growing heat-loving crops. Such a structure is able to withstand cold winds and sudden changes in weather. However, often the effectiveness of the structure depends on sunlight, so it should be installed on the south side of the site.

